
I used to think that keeping a kitchen looking sharp meant buying a specialized, $15 bottle of “premium luster” spray every time a fingerprint appeared on the fridge. I spent way too many Saturday mornings scrubbing at streaks with expensive chemicals, only to realize I was just adding more clutter to my cabinets and more noise to my mental load. If you’ve been searching for the “secret” to how to clean stainless steel without turning your kitchen into a laboratory, I’m here to tell you that the industry is largely selling you a solution to a problem that doesn’t exist.
I’m not interested in perfection or high-gloss gimmicks; I just want a home that feels steady and well-maintained. In this guide, I’m going to walk you through a few minimalist systems that use basic pantry staples to get the job done. We aren’t going to chase that impossible, showroom shine, but we are going to build a repeatable routine that keeps your surfaces clear and your mind even clearer. Let’s get into the practical side of things.
Table of Contents
Mastering the Flow Why Cleaning Grain Direction Changes Everything
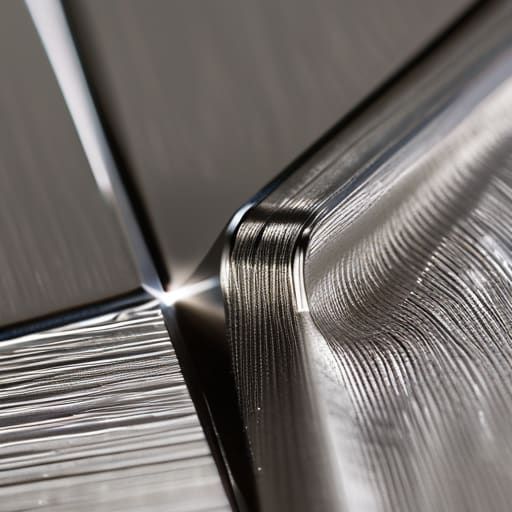
When I first started restoring mid-century furniture, I learned that you can’t just scrub a surface blindly; you have to respect the material. Stainless steel is no different. Most people approach a smudge with a frantic, circular motion, but that’s actually the quickest way to trap grime in the microscopic grooves of the metal. Instead, you need to find the cleaning grain direction. Think of it like the grain in a piece of wood. If you look closely at your appliances under a bit of direct light, you’ll see faint, linear streaks running across the surface. That is your map.
By aligning your movements with those lines, you aren’t just moving dirt around; you’re actually lifting it out of the texture. This makes removing fingerprints from steel significantly easier and prevents those annoying micro-scratches that happen when you fight against the metal. I’ve found that if you treat the process as a steady, rhythmic motion rather than a chore to be rushed through, you end up with a much more consistent finish. It’s a small shift in technique, but once you master the flow, you’ll notice your kitchen stays looking steady and intentional for much longer.
Natural Stainless Steel Cleaners for a Simpler Kitchen Routine
I’ve always been a fan of keeping my pantry stocked with things that actually serve a purpose, rather than a dozen specialized chemical sprays that just clutter the under-sink cabinet. When it comes to maintaining my appliances, I’ve found that the most effective natural stainless steel cleaners are usually already sitting in my kitchen. A simple solution of white vinegar and water is my go-to for a quick refresh. If you’re dealing with stubborn grease or those annoying marks left by a quick snack, a diluted vinegar spray works wonders without leaving behind any harsh, synthetic scents.
For the finishing touch, I swear by a tiny bit of olive oil or even a drop of coconut oil on a dry cloth. This is one of my favorite stainless steel polishing tips because it adds a subtle luster without a greasy residue. Once you’ve wiped away the grime, a quick buff with a tiny bit of oil helps in removing fingerprints from steel for days to come. Just remember to keep it minimal; we aren’t trying to wax a car here, we’re just looking to maintain a steady, clean surface that feels ready for the next meal.
Five Small Habits for a Low-Maintenance Shine
- Always work with the grain. It sounds technical, but it’s really just about following the natural lines of the metal to avoid those tiny micro-scratches that make a surface look dull over time.
- Keep a microfiber cloth on hand. I’ve learned the hard way that paper towels can leave behind lint and even tiny abrasions; a good microfiber cloth is much gentler and does most of the heavy lifting.
- Avoid the heavy-duty scrubbers. When you’re dealing with a stubborn smudge, skip the steel wool and reach for a soft sponge instead. We’re looking for a clean surface, not a stripped one.
- Use a drop of olive oil for the finishing touch. If your appliances look a bit lackluster after cleaning, a tiny amount of oil on a dry cloth can buff them back to a soft, even glow.
- Don’t let it pile up. I try to wipe down the fridge door or the stovetop immediately after a spill. It takes ten seconds in the moment, but it saves you a twenty-minute ordeal later in the week.
Keeping the Momentum

At the end of the day, keeping your appliances looking sharp doesn’t require a cabinet full of specialized, expensive chemicals. Just remember the basics: always work with the grain to avoid those annoying micro-scratches, and stick to simple, natural solutions like vinegar or a drop of mild soap. By focusing on these small, repeatable steps rather than trying to scrub away every single imperfection, you turn a tedious chore into a quick, manageable part of your weekly reset. It’s about having a reliable system that works for you, not a cleaning ritual that drains your energy.
I know how it feels when the small things—like a smudged fridge or a dull stovetop—start to add to that mental clutter we all deal with. But remember, the goal isn’t to have a showroom-perfect kitchen; it’s to create a space that feels steady and cared for. When you take five minutes to clear the surfaces, you aren’t just cleaning metal; you are reclaiming your environment. Don’t let the pursuit of perfection get in your way. Just pick up the cloth, follow the grain, and enjoy the sense of calm that comes with a little bit of order.
Frequently Asked Questions
Is it safe to use abrasive sponges or steel wool if I have a particularly stubborn burnt-on mess?
I’d say hold off on the steel wool. It’s tempting when you’re staring down a burnt-on mess, but those abrasives are way too aggressive; they’ll leave tiny scratches that actually make future messes stick even harder. Instead, try a little more patience. Let some warm, soapy water sit on the spot for a while, or try a paste of baking soda. It’s a slower process, but it protects the surface you’ve worked so hard to keep clean.
How often should I actually be doing this to keep it from getting overwhelming?
Honestly, don’t aim for a daily scrub; that’s a fast track to burnout. I find that a quick, once-a-week wipe down with a damp cloth keeps the grime from building up. If you notice heavy grease or fingerprints mid-week, just tackle that specific spot and move on. The goal isn’t a showroom-perfect kitchen every single day—it’s just about maintaining a steady baseline so the mess never feels like a mountain.
Can I use these same natural methods on my stainless steel appliances if they have a fingerprint-resistant coating?
That’s a great question, and honestly, it’s one I had to learn the hard way with a vintage sideboard. If your appliances have a fingerprint-resistant coating, I’d suggest stepping back from the vinegar. Those coatings are delicate, and the acidity can actually strip them away over time. Stick to a very mild solution—just a drop of gentle dish soap and warm water. It’s less “deep clean,” but it protects the finish you paid for.
What’s the best way to handle those annoying water spots that seem to appear right after I finish cleaning?
I’ve been there—you spend ten minutes scrubbing, only to see those tiny, stubborn water spots staring back at you. It’s frustrating. The trick isn’t more scrubbing; it’s about the finish. Keep a clean, dry microfiber cloth nearby and do a final “buffing” pass immediately after cleaning. If they’re really stubborn, a tiny drop of olive oil on a cloth can help buff them out and add a subtle, protective sheen.